How to Play
Before I use this problem with students, I prepare lots of Sphinx tiles. If my students are working individually or in pairs, I print and cut copies of Size A from the handout. If my students are working in groups of 3 or more, I print and cut copies of Size B. If my students are working on magnetic Vertical Non-Permanent Surfaces, I attach some small magnets to the tiles. I usually prepare about 10 sphinx tiles per group. (If my students are working on computers, I share this Polypad worksheet.)
When I introduce the problem, I don’t need to display the poster. Instead, I hold up one of the tiles and say, “This is a special pentagon called the sphinx. In a minute, I’m going to give you four copies of the sphinx, and I want you to try and make a bigger copy of the sphinx.” Note that my narration differs a bit from the poster …
Tasting Notes
Different ways to start: When I used this problem with my students last year, I initially gave them four sphinx tiles. When they were successful — and every group eventually was — I gave them five more tiles and asked them to use all nine to make a new sphinx. Then I gave them seven more tiles for a total of 16. When I used this problem with my colleagues, I gave them ten tiles and told them to use some to make a larger sphinx. Two of the groups used four tiles to find their first sphinx, and two groups used nine. Without knowing how many tiles to use, my colleagues had a lot more options, which can be empowering or overwhelming. If they seemed stuck or frustrated, I could give them a hint to use four tiles. Knowing my students last year, I decided they would benefit from starting with this hint.
Consider providing an outline: If some students needed more support, I would give them an outline of the bigger sphinx. For example, in this Polypad page, we made outlines for the sphinxes requiring 4, 9, and 16 tiles. We designed the handout so that one Size B sphinx perfectly fits four Size A sphinx tiles. I like having this scaffold prepared while keeping in mind that I don’t want to provide more support than needed.
Analyze the results: When a group of students successfully creates a larger sphinx, I encourage them to find another one! However, before they move on, we take a moment to analyze their creation. I ask the question from the poster, “how much bigger is your new sphinx?” This question is hopefully ambiguous. I want them to tell me that the new sphinx is four times as big (in area) and two times as big (on each side). This conversation helps students make sense of what the next sphinx will look like: we use nine tiles because the sides are three times as long. Knowing that each dimension will be three times as long helps students evaluate their own progress.
Add some language: At some point, it can be helpful to give names to the different sizes of the sphinx. I like how the Math Task Centre calls the sphinx made of a 4 tiles the “size 2” sphinx because the sides are twice as long. The size 3 sphinx has 9 tiles, the size 4 sphinx has 16 tiles, and so on. I find the language helps make the pattern easier to articulate: the size n sphinx has n2 tiles.
Make connections and ask new questions: At some point — often as a wrap up discussion — I like to highlight how the size 4 sphinx can be made of 4 copies of the size 2 sphinx. This observation raises all sorts of new questions. What sizes would be easy to make next? What sizes would be harder? What would a size 6 sphinx be like? Can we make any size sphinx? If so, what would it take to prove that? This can be a great moment to launch into re-energized play or to stop while leaving students wanting to play more on their own.
Where It Comes From
In 2022, I got the opportunity to lead a professional development series about Building Thinking Classrooms, and I wanted to start by giving teachers some first hand experience of what it felt like. I had a problem planned but then remembered that one teacher had already seen that problem. Then I stumbled upon this tweet from David Butler:
David has an incredible eye for playful math, so I dug a little deeper. I quickly found the Math Task Centre’s work on the sphinx, which (spoiler alert!) is an amazing resource, including solutions and lots of impressive student work. I decided to try it out for our PD and it was wonderful!

Why It Matters
Playful tasks can be part of the curriculum: In his books about Building Thinking Classrooms, Peter Liljedahl divides thinking tasks into two categories: curricular and non-curricular. But some problems can be both! Split 25 is a staple of my logarithms unit, I use Step Up when teaching sequences or recursion, and I never teach combinatorics without Trains. Sphinx is a great non-curricular task for the first day of school or the day before vacation, but I use it as a curricular task with my 10th graders when we’re learning about similarity and scaling areas. Theoretically, Sphinx could also be a good task for talking about prime numbers and factorization (a 4-sphinx can repeat structure from a 2-sphinx, a 6-sphinx can borrow structure from a 2-sphinx and a 3-sphinx, but a 5-sphinx has structure of its own).
Tactile play: Being able to touch and move the Sphinx tiles makes the problem easy to start. Plus, it’s fun, like having a new toy to play with.
Self-checking: Students usually don’t need a teacher to tell them if their new sphinx is “right” — they can evaluate their own work. I really enjoy looking at failed attempts with students and discussing why it failed and how to adjust.
Variations
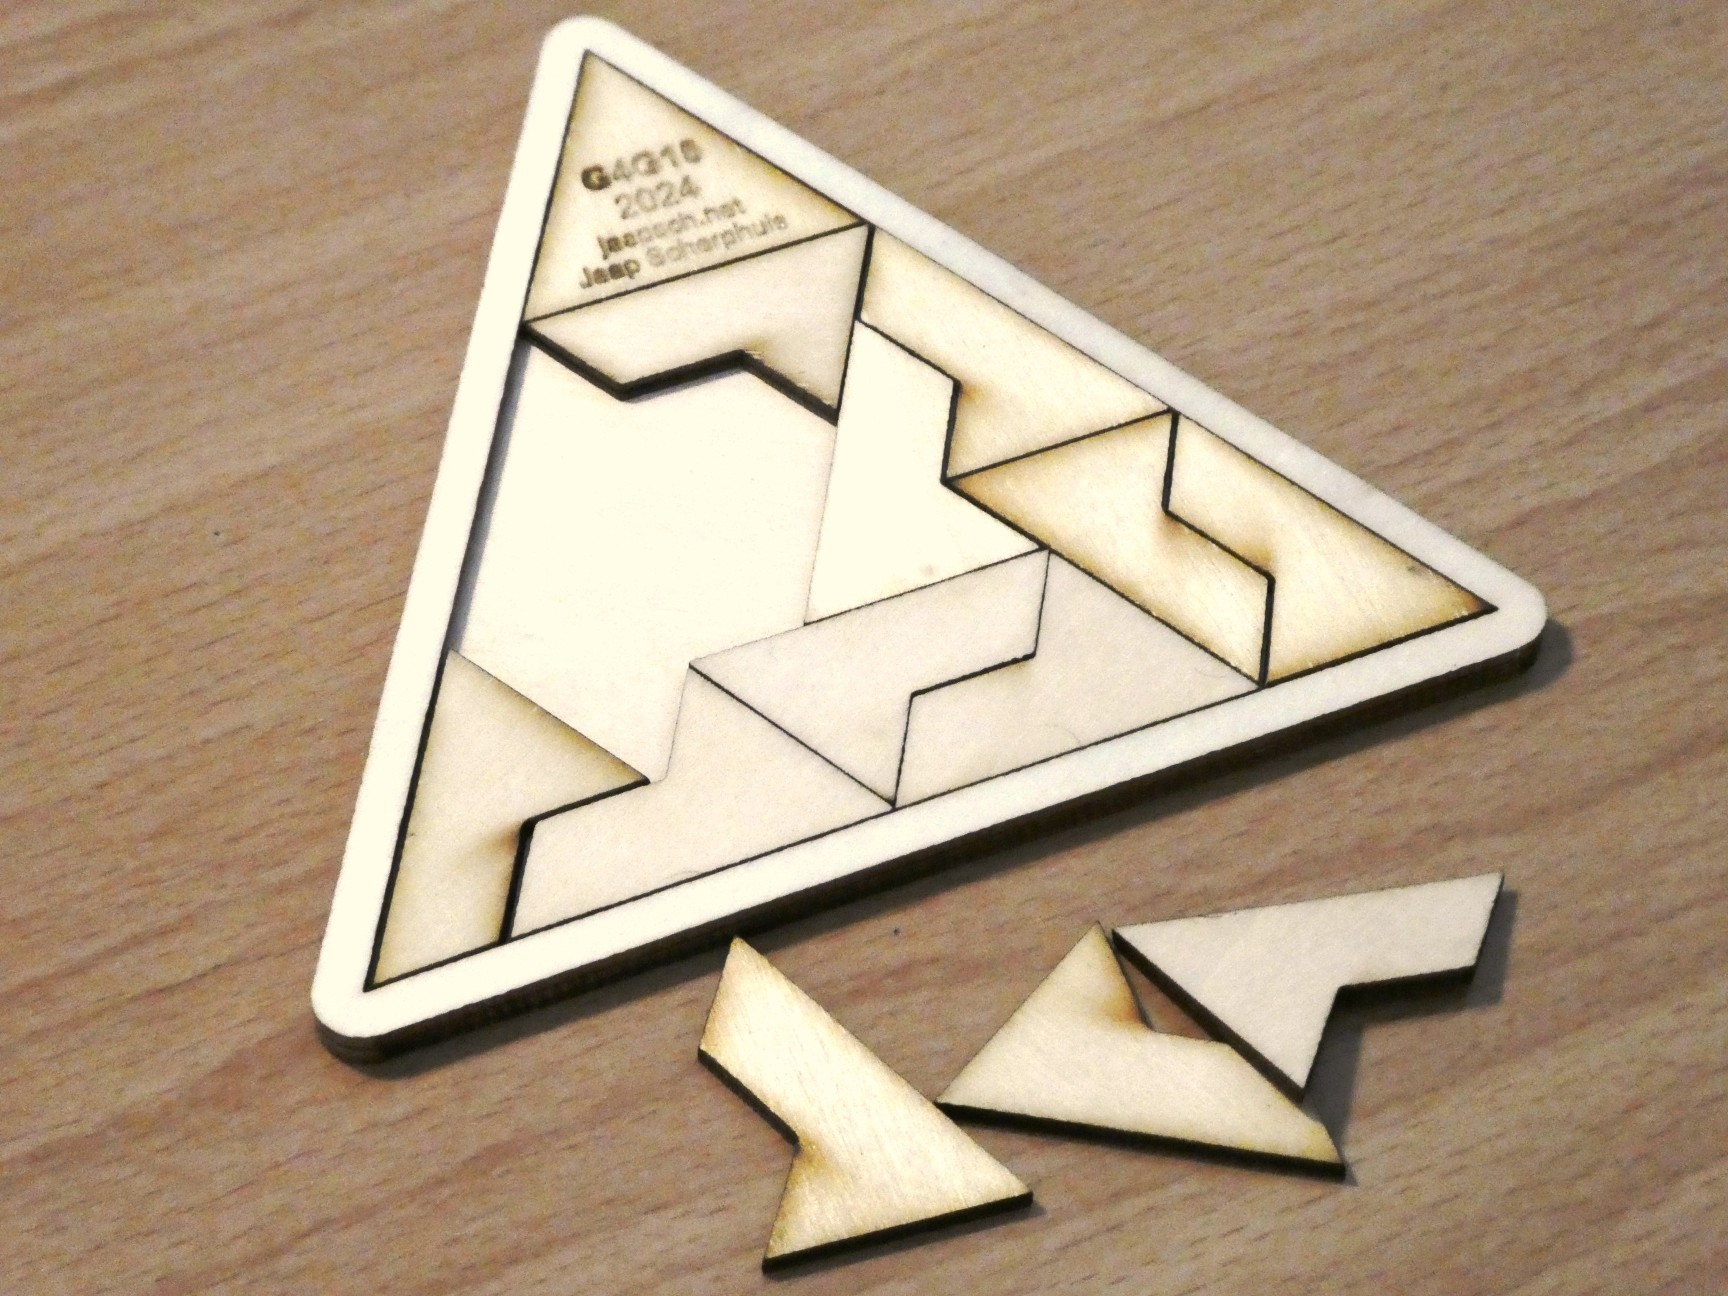
Make a different shape! Instead of making a bigger sphinx, make something else with sphinx tiles. For example, CiCi saw this puzzle at Gathering 4 Gardner:
Use a different shape! A shape that can make a scaled copy for itself is called a rep-tile. The sphinx is (kinda?) the only known pentagonal rep-tile, but there are lots of other rep-tiles. For example, Mathigon has a lesson about exploring a tetromino rep-tile.
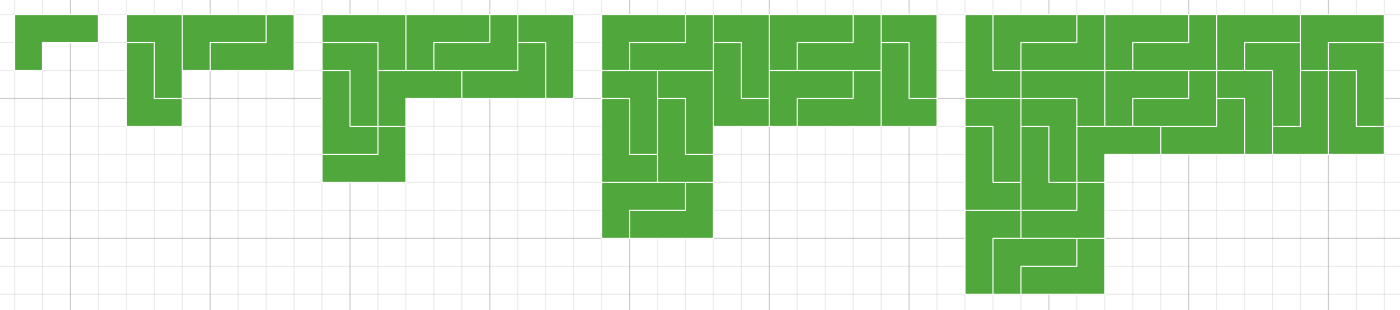
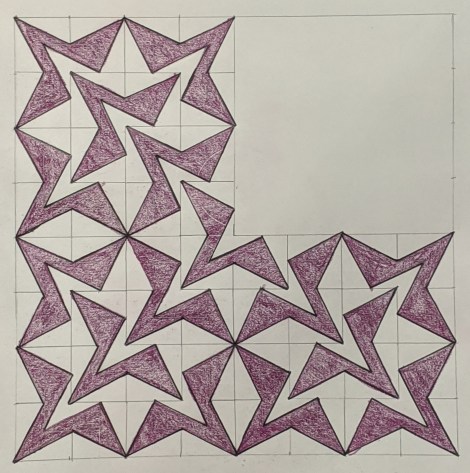
Make it art! Math Art Challenge #50 used the rep-tile structure of the L shape to make fractal art.